UWN in Spanish – Boletín Semanal de Ubuntu, edición #135

newspaper-icon-ubuntu

Bienvenido al Boletín Semanal de Ubuntu, Edición #135 para la semana del 22 de Marzo al 28 de Marzo, 2009 está disponible.

En ésta edición:

* Lanzado Ubuntu 9.04 Beta
* Banners de cuenta regresiva de Jaunty
* Ubuntu 7.10 alcanza EOL el 18 de Abril
* Cursos dedicados a Ubuntu Server
* Día de pruebas del QA Team: Instaladores de Ubuntu
* Estadísticas Ubuntu
* Ubuntu Makassar
* Lo“Co Team de Ubuntu Tunez
* Ubuntu New York: Día de Educación Tecnológica & Premiación, y Festival de lanzamiento
* Lanzado el Ubuntu Lo“Co Drupal 6.3.1
* Mantenimiento de Launchpad el 1ro de Abril
* Enlazar lanzamientos de proyectos en Launchpad a Milestones
* Linked“In para Miembros Ubuntu
* Suscripción de LWN para Ubuntu Members
* En la prensa & la blogósfera
* Podcast Ubuntu #23 & Entretevista a John Pugh
* Revista Full Circlee #23
* Próximas reuniones & eventos
* Actualizaciones & seguridad

Y mucho, mucho más!

El Boletín Semanal de Ubuntu es traído a ustedes por:

* John Crawford
* Craig A. Eddy
* Jeff Martin
* Dave Bush
* Kenny Mc“Henry
* J. Scott Gwin
* Liraz Siri
* Y muchos más

Traducido al Español por:

* Andres Rodriguez
* Rafael Rojas Cremonesi

Salvo que se indique lo contrario, el contenido de este sitio está bajo una licencia Creative Commons Attribution 3.0 LicensecclCreative Commons License

NOTA: Si desea contribuir por favor vea: https://wiki.ubuntu.com/UbuntuWeeklyNewsletter/Es

UWN in Spanish – Boletín Semanal de Ubuntu, edición #123

newspaper-icon

Bienvenido al Boletín Semanal de Ubuntu, Edición #123 para las semanas Diciembre 21, 2008 – Enero 3, 2009 está disponible.

En ésta edición:

* Notificaciones, indicadores y alertas
* Making LoCo Teams Rock
* Planeta Ubuntu y Blogs Corporativos
* Estadísticas Ubuntu
* Ubuntu Live en TV
* Revisión de Ubuntu Berlin del 2008
* Eventos del Equipo de Tunez en Diciembre
* 12 dias de Launchpad
* Noticias de los Foros de Ubuntu
* En la Prensa y la Blogósfera
* Revista Full Circle #20
* Resumen de Reuniones
* Próximas Reuniones y Eventos
* Actualizaciones & Seguridad

Y mucho, mucho más!

El Boletín Semanal de Ubuntu es traído a ustedes por:

* Nick Ali
* John Crawford
* Craig A. Eddy
* Dave Bush
* And many others

Traducido al español por:

* Andrés Rodriguez

Salvo que se indique lo contrario, el contenido de este sitio está bajo una licencia Creative Commons Attribution 3.0 LicensecclCreative Commons License

NOTE: Translation NOT finished. If you would like to help, or you have any questions/suggestions, please feel free to contact me. HELP NEEDED!! 🙂

Ubuntu Weekly Newsletter – Spanish Translation Efforts

The Ubuntu Weekly Newsletter is translated in many languages every week, but what I’ve noticed is that the Spanish translations have been abandoned. The last translated issue is Issue #95 (you can see it here: [1]).

I believe that there’s many people that would like to read it in their own language rather than English, and that would like to read more about local news. This is way I’m retaking the efforts to translating it into Spanish. The latest Issue (Issue #121) has been published here: [2] (It is not finished yet and needs review).

One thing that is important to know about the UWN translations is that we don’t have to translate it literally. We can include local news, such as news about Spanish speaking LoCo Teams, or more Ubuntu Related News in Latin America/Spain. So, if you want to collaborate in the translations efforts, in making it a better UWN in Spanish, or reviewing it, just contact me:

  • RoAkSoAx on #ubuntu-pe, #ubuntu-es, (and many other channels).
  • andreserl AT ubuntu-pe DOT org

[1]: http://doc.ubuntu-es.org/NSU/Edicion_Actual

[2]: https://wiki.ubuntu.com/UbuntuWeeklyNewsletter/Issue121/Es

UPDATE: Ubuntu Presentation!

On November the 21st and November the 22nd, there will be the “I Free Software Conference and Installation Festival” at National University of San Agustin, Arequipa – Peru. It is a great pleasure for me to announce that the Ubuntu Peruvian LoCo Team is going to participate giving a presentation of “Ubuntu Intrepid Ibex”. Btw, I’m the one who’s giving it =). I’m also going to talk about “HA-Clusters in Ubuntu”, which is a topic related to my thesis.

Well, anyways, It is also great to announce that Richard Stallman will be participating on the 22nd, giving a conference about “Human Rights for Software Users”. This event will gather almost 250 people. So, if someone from Arequipa – Perú gets to read this post, I hope to see you there!

Btw, The National University of San Agustin is migrating to Ubuntu… So, it is following UNMSN example. Well, wish me luck because after tomorrow, many people will be turning to Ubuntu :).

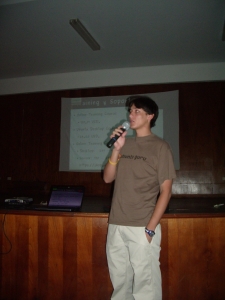
UPDATE: I’m updating this post to let people know that the event is finished and many people are turning to Ubuntu, and got interested on how to contribute, specially in Development and the LoCo. Hopefully, they will start their participation pretty soon. However, the most impressive thing that happened, is that a TV Show interviewed me after the conference and wanted me to explain them more about Ubuntu, what are the benefits of using it, if it’s pretty well known among organizations, and things like that. Well, I just have a couple of pics since my camera died. Enjoy =).

Ubuntu PresentationUbuntu Presentation 2

Posted in Planet, Ubuntu. Tags: . 4 Comments »

DRBD and NFS

Hey all. Sorry for the delay in posting this tutorial, I’ve been pretty busy and I finally had some time to finish it. Enjoy :).

Well, as you may know, in previous posts (Post 1, Post 2) I’ve showed you how to install and configure DRBD in an active/passive configuration with failover, automatically, using Heartbeat. Now, I’m going to show you how to use that configuration to export the data stored in the DRBD device (make it available for other servers in a network) using NFS.

So, the first thing to do is to install NFS in both drbd1 and drbd2, stop the daemon, and remove it from the upstart process (This means that we’ll have to remove the NFS daemon from starting during the boot up process). We do this as follows in both servers:

:~$ sudo apt-get install nfs-kernel-server nfs-common
:~$ sudo /etc/init.d/nfs-kernel-server stop
:~$ sudo update-rc.d -f nfs-kernel-server remove
:~$ sudo update-rc.d -f nfs-common remove

Now, you may wonder how is NFS going to work. The NFS daemon will be working only in the active (or primary) server, and this is going to be controlled by Heartbeat. But, since NFS stores information in /var/lib/nfs, on each server, we have to make both servers have the same information. This is because if drbd1 goes down, drbd2 will take over, but its information in /var/lib/nfs will be different from drbd1‘s info, and this will stop NFS from working. So, to make both servers have the same information in /var/lib/nfs, we are going to copy this information to the DRBD device and create a symbolic link, so that the information gets stored in the DRBD device and not in the actual disk. This way, both servers will have the same information. To do this, we do as follows in the primary server (drbd1):

mv /var/lib/nfs/ /data/
ln -s /data/nfs/ /var/lib/nfs
mkdir /data/export

After that, since we already copied the NFS lib files to the DRBD device in the primary server (drbd1), we have to remove them from the secondary server (drbd2) and create the link.

rm -rf /var/lib/nfs/
ln -s /data/nfs/ /var/lib/nfs

Now, since Heartbeat is going to control the NFS daemon, we have to tell Heartbeat to start the nfs-kernel-server daemon whenever it takes the control of the server. We do this in /etc/ha.d/haresources and we add nfs-kernel-server at the end. The file should look like this:

drbd1 IPaddr::172.16.0.135/24/eth0 drbddisk::testing Filesystem::/dev/drbd0::/data::ext3 nfs-kernel-server

Now that we’ve configured everything, we have to power off both servers, first the secondary and then the primary. Then we start the primary server, and during the boot up process we’ll see a message that will require us to type “yes” (This is the same message showed during the installation of DRBD in my first post).  After confirming, and If you have stonith configured, it is probable that drbd1 wont start its DRBD device, so it will remain as secondary, and won’t be able to mount it. This is because we will have to tell stonith to take over the service (To see if stonith is the problem, we can take a look at /var/log/ha-log). So, to do this, we do as follows in the primary server (drbd1):

meatclient -c drbd2

After doing this, we have to confirm. After the confirmation, Heartbeat will take the control, change the DRBD device to primary, and start NFS. Then, we can boot up the secondary server (drbd2). Enojy :-).

Note: I made the choice of powering off both servers. You could just restart them, one at a time, and see what happens :).

CISAISI 2008

CISAISI 2008 (Congreso Internacional Sud-Americano de Ingeniría de Sistemas, Computación e Informática 2008), is an International Latin American event of Systems Engineers, Computing and Informatics. This event is on its XII edition and it will be in Arequipa – Perú, from the 6 to the 10th of October, at Universidad Católica de Santa María – UCSM, which is the University where I’ve studied.

This event was created to do courses and debates, give conferences and summit scientific work. On the present edition of the CISAISI 2008, a new feature has been added, which is the “Poster Contest”, that allows young people, such as students, to summit any scientific work they are working on, related to Informatics.

On this edition, I summited my Thesis as a paper for this “Poster Contest”. This means that I’ll be presenting my Thesis (“Designing a Model to Implement High Availability Web Servers”), and talk about it during the event. This event is very important because many people from different cities around Latin America are going to be present. This is a good chance to promote Ubuntu in Cluster utilization, since my Thesis was done creating clusters in Ubuntu. This will show to many people that Linux, and specially Ubuntu, is a powerful OS to create High Availability Clusters. This will also introduce DRBD to the Latin American Market.

So, whish me luck!! :).

Brainstorm Idea Support

As you may know, I applied for JJ UDS Sponsorship. I think that today was the last that people could summit their ideas. But, people can still support them I guess. Since I have been pretty busy the past few days, I just got some time to explain my ideas a little more.

My first idea is Centralized Cluster Administration. This idea is related to the creation of an application that will help us implement and manage LVS Based Clusters. I got this idea because, as you may know, I did my thesis about Designing a Model to Implement High Availability Web Servers using LVS based clusters.


My second idea is Ubuntu Centralized Image Installation/Recovery/Backup. This idea is related to the creation of an application that will help us install Ubuntu from a centralized server on a LAN, similar to what RIS is. It will also allow us to create images, and be able to recover them and create backups, and so on.

So, if you think they are good ideas, it would be great to have your support. Thanks :).

Installing DRBD On Hardy!

DRBD (Distributed Replicated Block Device) is a technology that is used to replicate data over TCP/IP. It is used to build HA Clusters and it can be seen as a RAID-1 implementation over the network.

As you may all know, the DRBD kernel module has now been included into Hardy Heron Server Edition’s kernel, so there is no more source downloading and compiling, which makes it easier to install and configure. Here I’ll show you how to install and and make a simple configuration of DRBD, using one resource (testing). I’ll not cover how to install and configure heartbeat for automatic failover (This will be showed in a next post).

First of all, we will have to install Ubuntu Hardy Heron Server Edition on to servers and manually edit the partition table. We do this to leave FREE SPACE that we will be used later on as the block device for DRBD. If you’ve seen the DRBD + NFS HowTo on HowToForge.com, creating the partitions for DRBD and leaving them unmounted will NOT work, and we won’t we able to create the resource for DRBD. This is why we leave the FREE SPACE, and we will create the partition later on, when the system is installed.

So, after the installation we will have to create the partition, or partitions (in case we are creating an external partition for the meta-data, but in this case it will be internal), that DRBD will use as a block device. For this we will use fdisk and do as follows:


fdisk /dev/sda
n (to create a new partition)
l83 (to create it as logical and format it as Filesystem # 83)
w (to write the changes)

After creating the partitions we will have to REBOOT both servers so that the kernel uses the new partition table. After reboot we have to install drbd8-utils on both servers:

sudo apt-get install drbd8-utils

Now that we have drbd8-utils installed, we can now configure /etc/drbd.conf, which we will configure a simple DRBD resource, as follows:

resource testing { # name of resources

protocol C;

on drbd1 { # first server hostname
device /dev/drbd0; # Name of DRBD device
disk /dev/sda7; # Partition to use, which was created using fdisk
address 172.16.0.130:7788; # IP addres and port number used by drbd
meta-disk internal; # where to store metadata meta-data
}

on drbd2 { # second server hostname
device /dev/drbd0;
disk /dev/sda7;
address 172.16.0.131:7788;
meta-disk internal;
}

disk {
on-io-error detach;
}

net {
max-buffers 2048;
ko-count 4;
}

syncer {
rate 10M;
al-extents 257;
}

startup {
wfc-timeout 0;
degr-wfc-timeout 120; # 2 minutos.
}
}

Note that we are using drbd1 and drbd2 as hostnames. This hostnames must be configured and the servers should be able to ping the other via those hostnames (that means we need to have a DNS server or configure hosts for both servers in /etc/hosts).

After creating the configuration in /etc/drbd.conf, we now can create the DRBD resources. For this we issue the following in both servers:

sudo drbdadm create-md testing

After issuing this, we will be asked for confirmation to create the meta-data in the block device.

Now we have to power off both servers. After powering them off, we start our first server and we will see something similar to this:

After confirming with ‘yes’, we can now start the second server. After the second server is running. both nodes resources are secondary, so we have to make one of them primary. For this, we issue the following on the server we would like to have the resource as primary:

drbdadm -- --overwrite-data-of-peer primary all

We verify this by issuing:

cat /proc/drbd

And this should show something like this:

Well, up to this point, i’ve have showed you how to install and configure DRBD on Hardy, and how to make one of the servers have its resource as primary. But, we still don’t have automatic failover or automatic mounting. In a next post I’ll show how to configure heartbeat to have automatic failover and to take control of the resources, aswell as configuring STONITH to use the meatware device, so that we won’t have a split-brain condition (or at least try). I’ll also show how to configure NFS and MySQL to use this DRBD resource.

BTW, if you have questions you know where to find me :).

Cluster Sinchronization Tool (CSync2)

As you may know, there are many tools for file synchronization between servers that can suit your needs, but Csync2 (Website and Paper) was specially designed for Cluster File Synchronization, which makes it a great tool to synchronize config files and folders.

Now, I’ll show you a simple way of configuring it, by having a master server (where we can make changes to the config files) and one or multiple slave servers, where the files will be synchronized. First of all, we have to install it along with other packages:

:~# sudo apt-get install csync2 sqlite3 openssl xinetd

After having everything installed, we have to create the certificates that will allow Csync2 authenticate between servers so that the files can be synchronized. To do that we do this:

Read the rest of this entry »

Visual Fox Pro 6 and psqlODBC on Ubuntu with Wine

Few days ago, the Systems Adminitrator from a Financial Institution in my city asked me to make their Financial Systems work in Ubuntu. Believe it or not, they have them in VFP6, using PostgreSQL as their DBMS.

You could think it’s easy and that we just have to install VFP6 using WINE and that’s it. But that’s not the procedure I took. First of all, I changed wine to have Windows 95 as the default one. Then, I installed a VFP6 runtime (with wine) found here (_vfp6r_setup.exe). And finally, I copied the VFP98 folder, found in the Visual Studio 6.0 CD, to $HOME/.wine/drive_c/Program Files/.

After verifying that VFP6 was running OK, I installed the PostgreSQL ODBC Windows Driver. For that, I downloaded the driver from the PostgreSQL Web Site and installed it with msiexec, since it’s a *.msi file and not and *.exe (ex. msiexec /i installer.msi).

Now, after installing the PostgreSQL driver I had to decide how to create and work with DSN’s (Like in Windows). To do that, I thought i had to mess with the wine registry, but i didn’t. What i did, was to install Microsoft Data Access Components (The one used in Windows XP). I downloaded it from MS’s website (It is only available for those who have an Original Windows Copy), and installed it with wine.

After having everything was installed, it was time to create the DSN so that the VFP6 app could connect to PostgreSQL Database found in a server. To do that, I tried to open odbcad32.exe found in $HOME/.wine/drive_c/windows/system32/, but it failed. It is because wine doesn’t support the MDAC (Windows XP one) I was using, so i had to override a couple of libraries. To do that, I changed odbc32 and odbccp32 libraries, in the wine configuration, to be Native (Windows) instead of being the wine defaults.

After having all that, I just created a new DSN and copied the VFP6 app to the Ubuntu Machine and it worked flawlessly.